You’ve worked hard to create a live event – the next step is getting bodies in the seats. To make it easy and convenient for your customers, the best approach is to sell tickets online. And to make it easy on yourself, use Event Espresso 4.
Event Espresso 4 is an event registration and management plugin that enables you to set up your event for online sales in as little as three steps. At IvyCat, it’s our favorite events management plugin and we’ve used it for many of our client’s custom sites.
The plugin also includes more advanced features such as event check-ins, multiple ticket and pricing options, and multiple dates and venue options. For a fully branded customer experience, you can also customize the event designs, confirmation emails and event registration forms.
For the purpose of this illustration, I’m going to keep it simple – one ticket price, one date. Using a fictitious blogging workshop as an example, I’ll show you how to set up your event for online ticket sales.
Step 1: Set Up Your Organization
Before we get started, you must first download, install and activate Event Espresso from EventEspresso.com.
After you’ve activated your license key, go to Event Expresso > Settings > General Settings.

Enter your company’s name, contact information and tax ID. Note: The currency options are determined by the country you enter.
If you want add your logo to tickets, invoices, etc., go to the Upload New Logo field and upload it.
Click Save. Now let’s get you set up for the fun stuff – accepting payments.
Step 2: Set Up Your Payment Method
PayPal is a popular payment method, so we’ll use that for this example.
To set up PayPal, go to Event Espresso > Settings > Payment Methods.
From the list of payment options at the top, click PayPal Standard, then click Activate Paypal Standard Payments.

I’ve left the defaults in the fields shown above.

Enter the email you use for your PayPal business account. If you want your logo to appear on the PayPal payment page, upload it in the Image URL field.
In the Shipping Address Options setting, select whether a shipping address is required. I’m not physically mailing anything, so it’s not required for my blogging workshop.
If you want to use something other than the standard PayPal button, you can select it in the Button URL option.
I’ve left the default checked in the Usable From? field.
Click Update PayPal Standard Settings. You’ve got the payments sorted out, now it’s time to create that event!
Step 3: Create Your First Event
All that’s left is entering the event information.
Open the Event Editor by selecting Event Expresso > Event. Click the Add New Event button.

Much like a blog post, enter the name of the event as the Title and a description in the text editor.

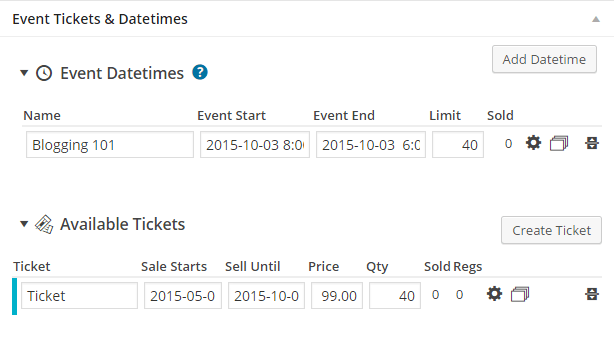
Scroll down to the Event Tickets & Datetimes section. Complete the Event Start and Event End fields (a calendar pops up to make it easy). If tickets are limited, enter that number in the Limit field. (I’m limiting my workshop attendees to 40.)
Right below that, a default free ticket has already been set up. Since my event isn’t free, I edited it accordingly.
There’s one last section to complete – the Event Registration Options widget (located in the sidebar).

If you want to limit how many tickets can be purchased per person, enter that in the Maximum Number… field. Tip: Do not enter “0” in this field, or you’ll have no tickets available to sell!
Select the Default Registration Status. Event Espresso recommends the Pending Payment option, as it allows attendees to make payments. However, payments won’t be an option for my $99 event, so I selected Approved.
Scroll back up to the Save New Event box and click Publish.
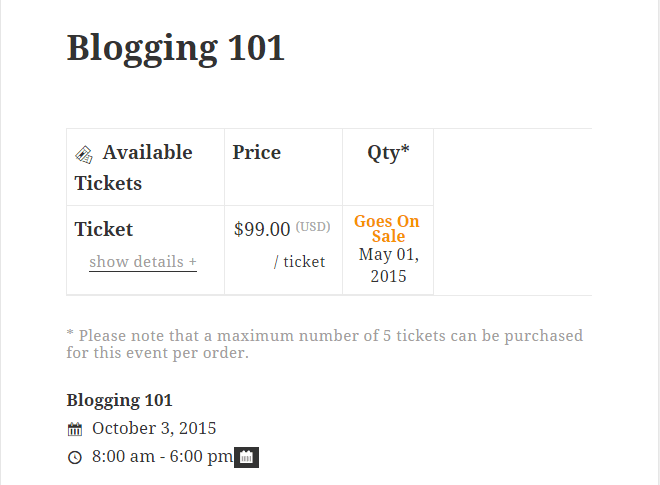
And that’s it! Here is my very basic event, using the default 2015 WordPress theme:

To recap, I entered my general company information, set up Paypal as my accepted payment method and entered the event details. I found Event Espresso to be extremely intuitive, and it has tool tips and documentation in case you get stuck.
Have you used Event Espresso? What did you think? Let us know in the comments section!

