The events industry continues to grow and get busier each year, with hundreds of companies, groups and individuals paying millions of dollars annually to organize events. However, organizing and managing an event is now less of a hassle thanks to a variety of tools that streamline event processes.
Event Espresso provides an incredible collection of powerful features that not only save time, but money too. The hugely popular plugin contributes millions of dollars in event ticket sales every year. In our humble opinion, Event Espresso is the ultimate plugin for you to manage local events.
In this post, we’ll test drive some key features of the plugin to see how to use them to organize a local event. You can sign up for a test drive account here.
Getting Started
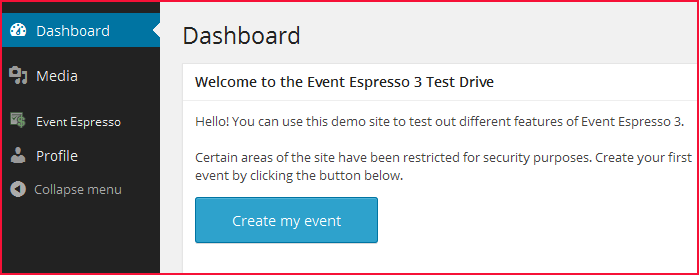
The first thing is to create an event. Click on the Create Event button.
 The main dashboard is made up of a series of menus.
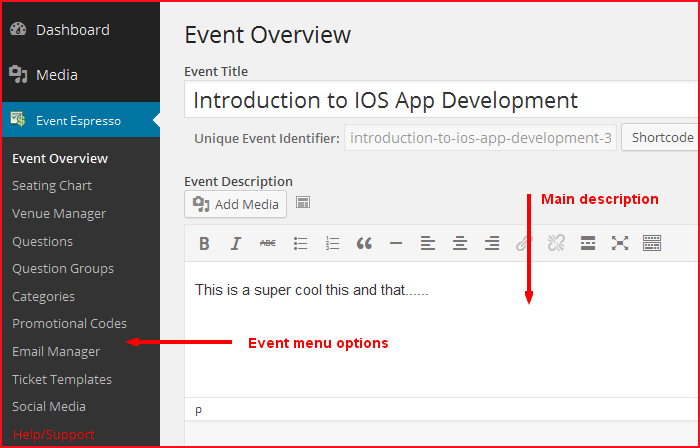
Event Overview is the main menu that opens a new post page where you input all the key details about your event, including the event name, description, event start and end dates, registration start and end, as well as registration start and end times.
 Registration times require details for the page to be displayed correctly.
After registration details is the Event Pricing section where you set prices for your event.
On the right side of the page is the Event Options page that offers more fine tuning options such as specifying whether or not to limit the number of attendees (unlimited by default), enabling group registrations, setting event status, and more. There is even a section comprising pre-populated questions for any type of event.
There are a bunch of advanced options that you can leave as default or specify custom values – such as event meta – but these are generally not very important details.
Once you’re done inputting the details of your event, click the Submit New Event button to create the event. You can then paste the shortcode for the event into a page to display it on your website.
Other Menu Settings
Once your event is created, you can come back to the dashboard and manage other details. For instance under the Seating Chart menu, you can upload a custom seating chart and manage other affairs of the seating plan.
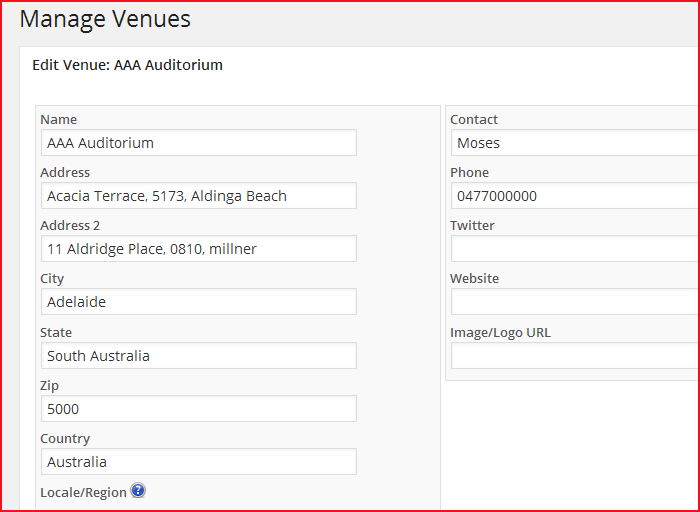
The next menu item is Venue Manager. Here you add location details for your event, down to the fine details of locale or region (managed on another page).
 Next you have the Questions and Question Group menus. With Questions, you can capture additional details about registrants besides the usual Name and Email Address details that are captured by default by the plugin.
In addition, you can add questions specific to your event under Questions, after which you add them to a Question Group.
The next menu item is pretty straightforward: categories. They work just the same as the normal categories for posts in WordPress. If you run recurring events, you can group them into categories for easier management.
Next is the Promotional Codes menu. If you want to offer a discount – for any reason – this is where you do it. Create promotional code and specify a discount, either as percentage or fixed amount. You then specify a few other settings and provide a promotional code description and submit.
Under the Email Manager menu that follows, you can create a series of emails for easy and automated communication for various events or just one event. Typical emails you’ll be creating include automated registration confirmation and other such messages. Of course, you can store these emails for reuse them for multiple future events.
The next menu is for creating event tickets from templates. There are 6 prebuilt CSS color schemes as well as layout templates to choose from. You can add a logo to make it truly customized.
Finally there is the social media menu that lets you share your event on Facebook, Twitter, and Google+. You can always edit or update many of these settings within the dashboard.
Conclusion
Whether you’re managing a local event or a gigantic international conference, Event Espresso provides amazingly easy and powerful tools to make your event a success. Moreover, all this is accomplished from a single dashboard. There are plenty of customization options and features, including those that enable you to run multiple events running concurrently.
Have you held events in your local area? How did you manage ticket sales online? Let us know in the comments below!

